Key Takeaways
- Steel building kits usually include primary frames, secondary members like purlins and girts, and connection hardware.
- Kits also include roof and wall panels with fasteners, trims, closure pieces, and sealants.
- Engineered plans are included to show dimensions, load paths, anchor requirements, and assembly details.
- Foundation work, concrete, insulation, utilities, doors, and windows are typically not included.
- Site preparation, tools, and optional add-ons like gutters or skylights must be planned and priced separately.
Steel Building Kit Contents
A steel building kit typically arrives as a coordinated package of structural framing, wall and roof panels, purlins or girts, connection hardware, fasteners, and engineered plans.
When you ask what’s included in a steel building kit, you’re really checking the core system that lets your project fit together cleanly and perform as specified. You’ll also get labeled parts that support accurate assembly, plus documentation that helps you verify dimensions, load paths, and anchor requirements.
This package doesn’t usually include site work, concrete, insulation, doors, windows, or utilities, so you can plan procurement with confidence.
Steel Building Kit Framing Components
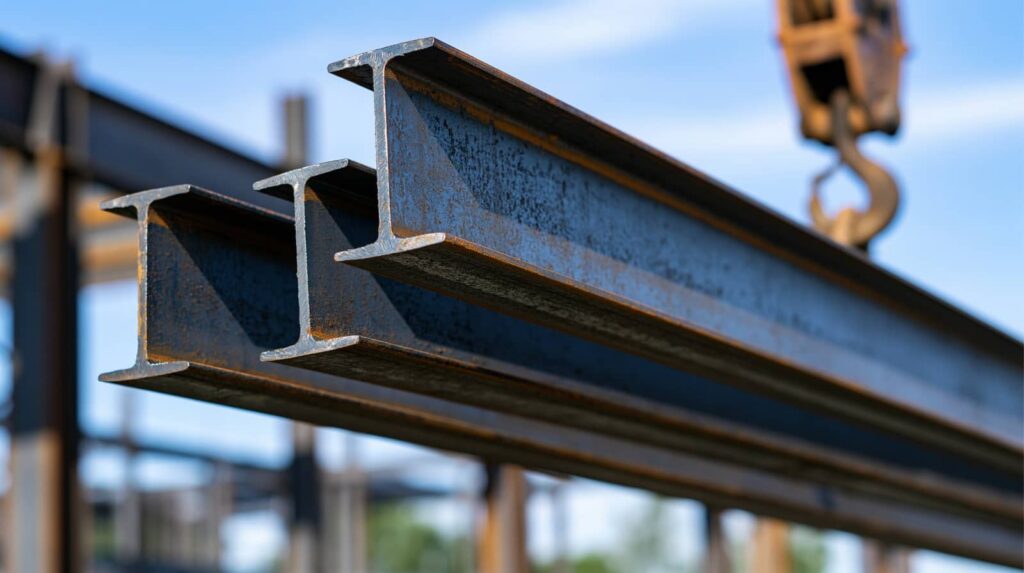
Steel framing is the backbone of the kit, and it’s what transfers roof, wall, and environmental loads into the foundation. You’ll typically receive primary rigid frames or clear-span members, plus secondary purlins, girts, eave struts, and bracing that stabilize the structure.
Each part works as a system, so you can align columns, rafters, and connections with the engineer’s layout. Your kit may also include clip angles, base plates, and anchor bolt templates, which help you set member locations accurately.
This framing package gives you the structural skeleton you need to assemble a code-compliant building with confidence and a clear sense of fit. When you know each component’s role, you can coordinate installation, verify quantities, and stay connected to the build process.
Metal Wall and Roof Panels
Shaped to close the building envelope, the metal wall and roof panels in your kit provide weather shedding, structural diaphragm support, and a finished exterior surface.
You’ll usually receive formed steel panels sized to match your frame spacing and roof slope, which helps you assemble the shell efficiently and with fewer field modifications. Their profiles improve stiffness, channel runoff, and create a consistent load path when installed as specified.
Because they’re factory finished, they also give your building a clean, unified appearance that fits in with a professional shop, warehouse, or agricultural facility.
You can count on the panels to define the enclosure, reduce exposure to the elements, and support the performance of the entire system while keeping your project aligned with the kit design.
Fasteners, Trims, and Sealants
Along with the wall and roof panels, your kit includes the hardware that locks the system together and seals the envelope: fasteners, trims, and sealants.
You’ll typically receive self-drilling screws, closure clips, and washers sized for the specified panel profile and gauge. These parts transfer loads, maintain alignment, and reduce vibration at joints.
Trims finish corners, eaves, ridges, and openings, so you get a clean edge and a tighter fit. Sealants, including butyl tape and compatible caulk, block air and moisture at laps, penetrations, and terminations.
You need to match each item to the manufacturer’s details, because compatibility affects corrosion resistance and long-term performance. When you install them correctly, you’re joining a system designed to work as one.
Doors, Windows, and Accessories
When you specify doors, you need to confirm the opening size, frame type, and insulation rating so the kit matches your load and access requirements.
You can also select window and accessory packages that improve daylight, ventilation, and operational functionality, but these items often add to the base kit cost.
You’ll want to verify which components are included and which you’ll need to source separately before ordering.
Door Options
Door options in a steel building kit usually cover the opening systems tied to the structure, including framed openings for walk doors, roll-up doors, and window placements. However, the kit often doesn’t include the actual door units or glazing. You’ll typically coordinate these openings with your use case, clearances, and panel layout so the building performs as designed.
- Walk doors need proper rough openings and trim details.
- Roll-up doors require header support and side jamb alignment.
- You may need separate hardware, seals, and locks.
You’ll want to verify dimensions before ordering, because mismatched openings can delay installation and raise costs.
When you plan each entry point carefully, you keep your crew aligned and your project moving with confidence.
Window And Accessory Packages
Window and accessory packages typically bundle the finish items that coordinate with the building shell, such as framed door openings, window trim, closure pieces, and related mounting accessories, but they don’t always include the actual doors, windows, or glazing units themselves.
You should verify each line item, because manufacturers often separate structural framing from finish hardware. Expect to see jamb components, clips, sealants, flashing, and fasteners that support clean installation and weather tightness.
If you’re planning natural light or pedestrian access, confirm rough opening sizes, load requirements, and compatibility with your selected fenestration. This package helps your project feel complete and connected, but you’ll usually source the operable units, insulation, and sometimes labor separately.
That clarity keeps your build organized and your crew aligned.
Plans, Drawings, and Permit Documents
You’ll need to confirm whether your steel building kit includes engineered stamped drawings, because these documents define the structural design and load assumptions.
You’ll also need a permit package that typically compiles the plans, specifications, and calculation sheets required by the local building department.
If those documents aren’t included, you’ll have to obtain them separately before you can submit for approval.
Engineered Stamped Drawings
Engineered stamped drawings define the structural requirements of the steel building kit and support permit approval by showing how the frame, connections, and load paths are designed.
You’ll use them to verify that your kit matches local wind, snow, and seismic criteria, so your project starts on solid ground with the right team. These drawings usually identify:
- column spacing and bay dimensions
- member sizes and connection details
- anchorage and brace locations
You can compare the drawings against your site conditions before fabrication starts, which helps you catch conflicts early.
When you understand the stamped plans, you’re better prepared to coordinate with your contractor, engineer, and inspector. That clarity gives you confidence that your building belongs on your site and performs as intended.
Permit Package Documents
A complete permit package gives your project the documents the building department needs to review code compliance, site placement, and structural design before it approves construction.
You typically submit site plans, foundation details, anchor bolt layouts, elevation sheets, and structural calculations with the engineered drawings. This packet lets your jurisdiction verify setbacks, wind and snow loads, fire access, and utility clearances.
When you stay organized, you reduce revision cycles and move closer to permit approval with your project team. Your permit set may also include energy forms, zoning exhibits, and manufacturer specifications if the reviewer asks for them.
Keep every sheet consistent, because mismatched dimensions can trigger delays. With a complete package, you and your builder share a clearer path to compliant construction.
Foundation Materials You’ll Need to Buy
Foundation materials are one of the biggest exclusions from a steel building kit, so you’ll need to budget for concrete, reinforcing steel, anchor bolts, and any base hardware required by your design.
You’re buying the structural interface that transfers loads into the ground, so accuracy matters. Match the slab or footing mix to your engineer’s specifications, not guesswork, because thickness, psi, and reinforcement spacing all affect performance.
- Concrete for slabs, footings, or piers
- Rebar or mesh for tensile support
- Anchor bolts, nuts, and templates
You’ll also need to verify edge dimensions, embedment depth, and bolt locations against the stamped plans.
When you source these materials early, you stay aligned with the build team and avoid costly field changes later.
Site Prep, Tools, and Equipment
Before you start erection, you’ll need a graded, level site with verified dimensions, access for delivery trucks, and clear drainage paths.
You’ll also need the right tools and equipment, including layout instruments, anchoring tools, lifting gear, and fastening equipment matched to the kit’s specifications.
Plan for any excluded items separately, because the kit typically covers the structural components but not the full site-prep or installation hardware.
Site Preparation Needs
Proper site preparation sets the stage for a successful steel building kit installation, and you’ll need more than the kit itself to get there. You should verify grading, drainage, and soil stability before you schedule delivery.
A level, compacted pad helps your frame align correctly and reduces settlement risk. You also need clear access for material staging and erection, so confirm turning radii and overhead clearance.
- Check local setbacks and utility locates.
- Remove vegetation, debris, and topsoil.
- Confirm foundation dimensions against the plans.
When you prep the site well, you join the group of owners who avoid costly rework and keep assembly moving. That discipline protects your investment and gives your crew a controlled, predictable starting point.
Required Tools And Equipment
A well-stocked jobsite keeps steel building kit installation on schedule. You’ll need a surveyor’s level, laser level, tape measures, string lines, chalk, and a square to verify layout and anchor positions.
For handling components, use a forklift, telehandler, or crane sized to your heaviest framing member, plus nylon slings, spreader bars, and tag lines to control loads. You should also keep impact wrenches, torque wrenches, drills, bits, clamps, and a rivet gun ready for assembly.
Add ladders, scaffolding, man lifts, and fall protection for safe access. For site prep, bring compactors, shovels, grading tools, and a plate tamper.
Finally, stock PPE, extension cords, generators, and weather protection so your crew can work efficiently and stay aligned.
Insulation and Ventilation Options
Insulation and ventilation don’t usually come in a standard steel building kit, so you’ll need to plan them as separate additions if you want better temperature control and moisture management.
You should specify the thermal value and airflow rate that match your use case, because steel transmits heat quickly and traps condensation without correction. When you choose these systems, you’re protecting both comfort and structure.
- Insulation limits heat gain, heat loss, and interior surface condensation.
- Ventilation exchanges stale air and helps control humidity buildup.
- Coordinating both systems improves efficiency and supports consistent indoor conditions.
You’ll fit in better with a building that performs well when you match these options to climate, occupancy, and intended function.
Common Steel Building Kit Add-Ons
Beyond insulation and ventilation, you’ll often need to budget for add-ons that a steel building kit doesn’t include by default. You may specify gutters, downspouts, and trim packages to control runoff and seal exposed edges.
You’ll also likely need doors, windows, skylights, and interior partitions to match your operational layout. If you want a finished workspace, consider vapor barriers, liner panels, and lighting, since these improve moisture control and usability.
Anchor bolts, sealants, and closure strips can add to the total, too, especially when your site demands tighter performance tolerances. You’re not just buying parts; you’re shaping a building that fits your crew’s workflow.
Check each quote line by line so you can compare apples to apples and avoid gaps later.
Frequently Asked Questions
Can a Steel Building Kit Be Customized After Ordering?
Yes, you can often customize a steel building kit after ordering, but you’ll need to confirm changes quickly. You’ll likely affect engineering, pricing, and lead times, so you should review revisions with your supplier carefully.
How Long Does Delivery Usually Take for a Steel Building Kit?
Delivery usually takes 4 to 12 weeks, depending on size, customization, and manufacturer backlog. You’ll get faster turnaround on standard kits, while engineered or oversized orders can add production and shipping delays.
Are Steel Building Kits Difficult to Assemble Yourself?
They’re manageable if you’ve got basic tools, careful planning, and some construction experience. You’ll follow engineered plans, bolt parts together, and align panels precisely; larger kits often benefit from extra hands or a pro.
What Warranties Come With Steel Building Kits?
You’ll usually get a limited structural warranty, paint-coating coverage, and sometimes engineering or roof-leak protection. Think of it as a shield: you’re covered against defects, but you’ll still need to verify exclusions, durations, and registration requirements.
Do Steel Building Kits Meet Local Building Codes?
Yes, you can meet local building codes if you choose a kit engineered for your jurisdiction, follow stamped plans, and secure permits. You’ll still need to verify wind, snow, seismic, and foundation requirements with officials.
Review
Your steel building kit is the skeleton and skin of your project, but you still have to supply the foundation, utilities, and finishing systems. When you understand what’s included, you can plan with precision and avoid costly gaps in scope. Think of the kit as a blueprint in box form: complete enough to build, but only when you add the site work and accessories that make it functional, compliant, and ready for use.